Many articles on Improve Photography refer to audio files, videos, and other media that are not included if you read our posts this way. Click the title of the article to read this post on the site.
I spent last weekend in a planetarium enjoying the night sky through an incredibly powerful telescope. My kids had never stayed up so late in their lives, so I regretted the decision later, but it has me thinking about night photography. Consequently, I wanted to share with you a few tips I’ve learned over the years as I have shot photos of the moon.
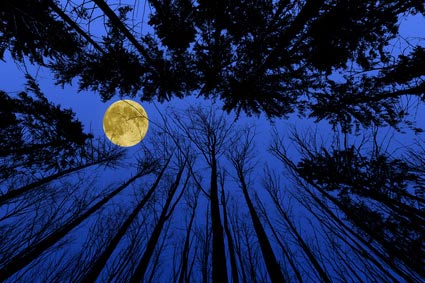
Show scale by including foreground elements.
#1 Show Scale
The moon is 239,000 miles (384,000 kilometers) from Earth. Despite its size, it is apparently tiny in the night sky. As you photograph the moon, your biggest challenge will be finding a way to connect it to the earth in a visual way in the photograph. (By the way, I’m resisting a strong urge right now to quote George Bailey in It’s a Wonderful Life right now).
One simple way to visually “throw a lasso around the moon and pull it down” (sorry, I warned you that the urge was strong) is to include a foreground in the photo. In the above example, trees are used to show a sense of scale and to connect the moon with elements on Earth to which the viewer can relate.
#2 Shoot Telephoto
Even if you plan on including foreground elements in your moon photo, be sure to shoot with a much longer lens than you normally do. Otherwise, the moon will be little more than a speck in the sky. Depending on the lunar cycle (which affects the size of the moon in relation to Earth), a good starting point would be a lens of at least 150mm if you want the moon to be a main element in the photo. If the moon is only a small part of a larger landscape, you could shoot between 70-100mm for a smaller moon.
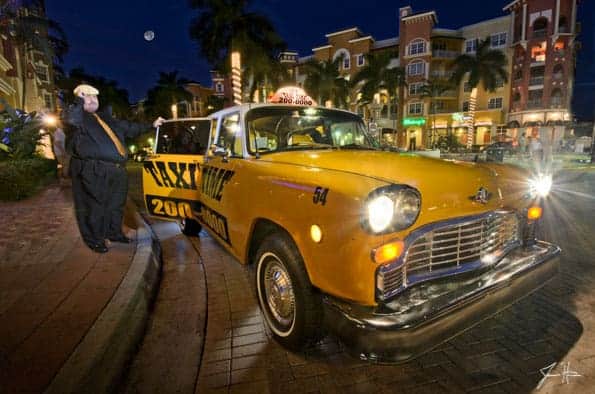
See the moon in the background? It’s easy to toss into night photos if you have some moon shots in your Lightroom Library! “Taxi Cab at Night” – Photo by Jim Harmer
#3 Grab At Least One Tight Shot
If you shoot night photography frequently, having a few nice tight and detailed photos of the moon in your Lightroom Library can be extremely helpful. Before you finish your moon shoot, be sure to zoom in to 300mm on a longer lens and grab a few tight shots of the moon with nothing else but sky in the frame.
I frequently toss a moon in my night photos to add to the serene mood I want those photos to have. Also, the moon is almost always overexposed in night photos because it is so much brighter than the rest of the landscape, so having a nice moon shot in your library can be an easy way to fix the overexposure.
#4 Shoot the Full Moon Right at Moonrise
Most photographers understand that shooting nature photography during the daylight hours is not all the same. Shooting at sunrise and sunset is most common for landscape photographers. However, photographers somehow forget about lighting entirely when they start out in night photography.
PhotoDoto has a great tip for shooting the moon at the very best time–when the full moon is rising:
[sws_blockquote align="" alignment="aligncenter" cite="http://photodoto.com/four-basic-tips-for-photographing-the-moon/" quotestyles="style01"] . . Sure, you can just look up at the moon every night and exclaim, “Whoa, . there it is!” but that’s no way to ensure that you snap pictures of it when the time’s most opportune. Instead, go the scientific route and head to the U.S. Naval Observatory website, where you can specifically calculate when the moon’s going to rise and set, both in the U.S. and internationally.” [/sws_blockquote]
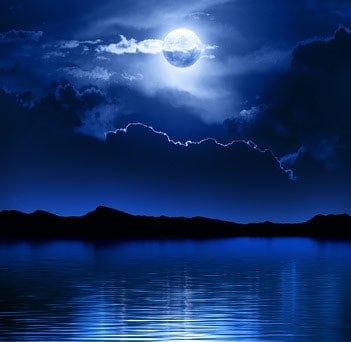
Cloudy moons make for great photos!
#5 Wait for the Clouds
The photo on the right is a perfect example of why waiting for clouds to partially cover the moon can make for stunning moon photos. The moon backlights the clouds, which creates a glow around the area of the moon in the photo.
Photographers are often tempted to shoot the moon on cloudless nights, but usually spotty clouds in the sky make the best conditions for shooting the moon.
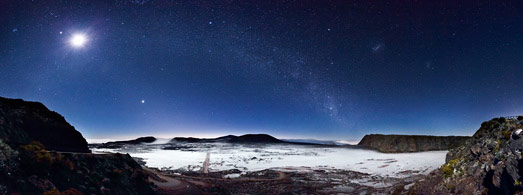
Moon Panorama
#6 Want Stars? Forget the Full Moon!
The full moon is beautiful, but remember that the brightness of a full moon will almost always drown out the stars around it. If you want a photo of the night sky with the moon and stars, your best bet is to shoot the moon when it is just a sliver of a crescent in the sky.
As you can see in the panorama above, the stars right around the moon are much less visible than the stars further away from it in this extremely wide panorama. The stars are less visible not so much because the moon drowns out the light of the stars, but because the moon brightens the empty area of sky around the stars.
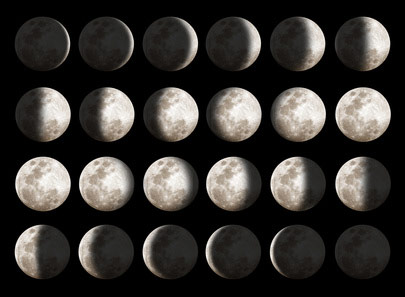
Moon phase chart
#7 Know Your Moon
A basic knowledge of the moon and how it works is helpful to plan for your shoot this year and in years to come. Here is some basic information:
Ready for Pinterest!
What are the various moon phases called?
Full moon – a full moon is really a misnomer. Obviously, it is only half the moon that is visible to the earth (unless you are skilled at seeing around edges of the moon).
Gibbous moon – a gibbous moon is where 3/4 of the moon is illuminated. It is said to be a “waxing gibbous” if the illuminated portion is on the right, and a “waning gibbous” if the illumination is on the left side of the moon.
Quarter moon – the quarter moon is when the visible portion of the moon is cut in half. It is called a “first quarter” moon when the visible portion is on the right, and a “third quarter” when the illuminated portion is on the left.
Crescent moon – this one is simple to remember! This is when the moon is just a crescent-shaped sliver in the sky. It is deemed a “waxing crescent” when the illumination is on the right, and “waning” when on the left — just like with the gibbous moon.
New moon – the new moon is easily remembered by thinking “no moon.” This is when the moon is not illuminated. With no visible illumination on the moon, the stars appear much brighter, so get out and shoot the Milky Way!
What is the supermoon?
The so-called supermoon occurs when the moon is either full or in new moon phase when the moon is the closest it gets to Earth in its orbit. This occurrence has the practical effect of making the moon appear between 10 and 30% larger.
When will the next supermoon occur?
While many photographers may have the supermoon marked on their calendars and the news makes it seem like a once-in-a-lifetime event, the truth is that a “supermoon” occurs every 14 lunar cycles — which is just over a year. If you are the calendar-marking type, the next supermoons will occur on August 10, 2014; October 27, 2015; December 14, 2016; and January 2, 2018.
This article is a part of a series on night photography. Read the rest of my night photography articles here.
The post 7 Essential Tips for Photographing the Moon appeared first on Improve Photography.


